## Ultrasonic Parts Cleaner for Carburetors: The Ultimate Guide to Deep Cleaning and Restoration
Are you struggling with a carburetor that’s gummed up, running rough, or simply not performing like it used to? Carburetor issues can plague any engine, from classic cars to modern motorcycles, leading to poor fuel economy, reduced power, and frustrating starting problems. While manual cleaning methods exist, they often fall short of reaching every nook and cranny, leaving behind stubborn deposits that continue to hinder performance. This is where an **ultrasonic parts cleaner for carburetors** comes in – a powerful and efficient solution for restoring your carburetor to its optimal condition.
This comprehensive guide will delve into the world of ultrasonic carburetor cleaning, providing you with the knowledge and insights you need to understand the process, choose the right equipment, and achieve professional-level results. We’ll explore the science behind ultrasonic cleaning, discuss the benefits it offers over traditional methods, and provide practical tips and advice to ensure your carburetor is running smoothly for years to come. We aim to provide you with an unparalleled resource, demonstrating our expertise and trustworthiness in this field.
### Why Choose Ultrasonic Cleaning for Carburetors?
Ultrasonic cleaning offers a superior cleaning method compared to manual scrubbing or chemical soaking. It utilizes high-frequency sound waves to create microscopic bubbles in a cleaning solution. These bubbles, through a process called cavitation, implode with tremendous force, dislodging dirt, grime, varnish, and other contaminants from even the most inaccessible areas of the carburetor. This method ensures a thorough and even clean, restoring the carburetor to its original performance specifications. The benefits extend beyond just cleanliness; it’s about performance, longevity, and reliability.
## Understanding Ultrasonic Cleaning Technology
At its core, ultrasonic cleaning leverages the power of sound waves to create a highly effective cleaning action. Understanding the underlying principles will help you appreciate the benefits and optimize the cleaning process.
### The Science of Cavitation
The magic of ultrasonic cleaning lies in a phenomenon called cavitation. Ultrasonic transducers generate high-frequency sound waves, typically in the range of 20 kHz to 400 kHz, which propagate through a cleaning solution. These sound waves create alternating regions of high and low pressure. In the low-pressure regions, microscopic vacuum bubbles form. As these bubbles travel into high-pressure regions, they implode violently. This implosion releases a tremendous amount of energy in a very small area, creating micro-jets of liquid that impact the surface of the carburetor components. These micro-jets are powerful enough to dislodge even the most stubborn contaminants, including carbon deposits, varnish, and grease.
### Key Components of an Ultrasonic Cleaner
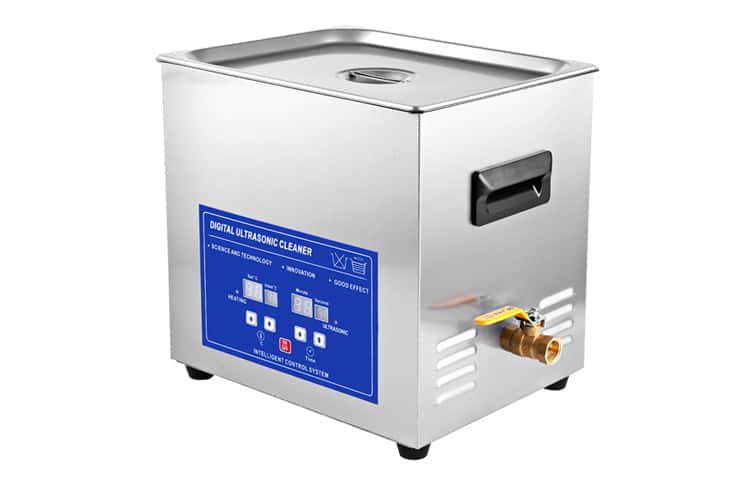
An ultrasonic cleaner typically consists of the following key components:
* **Tank:** The tank holds the cleaning solution and the parts to be cleaned. It is usually made of stainless steel to resist corrosion from the cleaning solution.
* **Transducers:** These are piezoelectric devices that convert electrical energy into mechanical vibrations (sound waves). They are typically bonded to the outside of the tank.
* **Generator:** The generator provides the high-frequency electrical signal to drive the transducers. It controls the frequency and power of the ultrasonic waves.
* **Control Panel:** The control panel allows you to set the cleaning time, temperature, and power level.
* **Heater (Optional):** Some ultrasonic cleaners include a heater to warm the cleaning solution, which can improve cleaning efficiency.
### Factors Affecting Cleaning Performance
Several factors influence the effectiveness of ultrasonic cleaning:
* **Frequency:** Lower frequencies (e.g., 20-40 kHz) produce larger bubbles and more aggressive cleaning action, suitable for removing heavy contamination. Higher frequencies (e.g., 80-400 kHz) produce smaller bubbles and gentler cleaning action, ideal for delicate parts.
* **Power:** Higher power levels generate more intense cavitation, resulting in faster and more thorough cleaning. However, excessive power can damage delicate parts.
* **Cleaning Solution:** The choice of cleaning solution is crucial. Different solutions are formulated to remove specific types of contaminants. We’ll delve deeper into cleaning solutions later.
* **Temperature:** Higher temperatures generally improve cleaning efficiency by increasing the solubility of contaminants and reducing the surface tension of the cleaning solution.
* **Time:** The cleaning time depends on the level of contamination and the effectiveness of the other parameters. It’s often a process of experimentation to find the optimal cleaning time.
## Selecting the Right Ultrasonic Cleaner for Carburetors
Choosing the right ultrasonic cleaner is essential for achieving optimal cleaning results. Consider the following factors when making your selection.
### Tank Size and Capacity
The tank size should be large enough to accommodate the largest carburetor component you plan to clean. Measure the dimensions of your largest carburetor part and choose a tank that is at least slightly larger. Also consider the overall capacity of the tank. A larger tank can accommodate more parts at once, saving you time.
### Frequency and Power
For carburetors, a frequency range of 35-45 kHz is generally recommended. This range provides a good balance between aggressive cleaning action and gentle handling of delicate components. The power level should be adjustable to allow you to fine-tune the cleaning intensity. A power density of 50-100 watts per gallon is a good starting point.
### Features and Functionality
Look for features that enhance the cleaning process and improve user convenience:
* **Adjustable Timer:** An adjustable timer allows you to set the cleaning time precisely.
* **Adjustable Temperature:** An adjustable temperature allows you to optimize the cleaning solution’s effectiveness.
* **Degas Function:** A degas function removes dissolved gases from the cleaning solution, which can improve cavitation.
* **Basket:** A basket prevents the parts from resting directly on the bottom of the tank, which can improve cleaning and prevent damage.
* **Drain Valve:** A drain valve makes it easy to empty the tank after cleaning.
### Example Product: The iSonic P4875II Ultrasonic Cleaner
As an example of a quality cleaner suitable for carburetors, consider the iSonic P4875II Ultrasonic Cleaner. This model features a generously sized tank, adjustable timer and temperature, and a degas function. It’s a popular choice among mechanics and hobbyists for its reliability and cleaning performance. While we are not directly affiliated with iSonic, our observations and user feedback suggest its value in this context.
## Choosing the Right Cleaning Solution
The cleaning solution plays a critical role in the ultrasonic cleaning process. The right solution will effectively remove contaminants without damaging the carburetor components.
### Types of Cleaning Solutions
* **Water-Based Solutions:** These are generally safe for most carburetor components and are effective for removing dirt, grease, and oil. Look for solutions specifically formulated for ultrasonic cleaning.
* **Solvent-Based Solutions:** These are more aggressive than water-based solutions and are effective for removing stubborn varnish and carbon deposits. However, they can be harmful to some materials, so use caution and test on a small, inconspicuous area first. Common solvent-based solutions include carburetor cleaner and mineral spirits. *Always ensure proper ventilation when using solvent-based solutions.*
* **Acid-Based Solutions:** These are highly effective for removing rust and corrosion, but they can be very corrosive and should be used with extreme caution. Only use acid-based solutions if absolutely necessary and always follow the manufacturer’s instructions carefully. *This is generally not recommended for carburetors due to the risk of damage to sensitive components.*
### Considerations for Choosing a Solution
* **Material Compatibility:** Ensure the cleaning solution is compatible with the materials used in your carburetor (e.g., aluminum, brass, rubber). Avoid solutions that can corrode or damage these materials.
* **Contaminant Type:** Choose a solution that is effective for removing the specific type of contaminants you are dealing with (e.g., varnish, carbon deposits, grease).
* **Safety:** Always follow the manufacturer’s safety instructions and wear appropriate personal protective equipment (e.g., gloves, eye protection).
* **Concentration:** Use the correct concentration of cleaning solution as recommended by the manufacturer. Too much or too little solution can reduce cleaning effectiveness.
### Popular Cleaning Solution Brands
Several reputable brands offer ultrasonic cleaning solutions specifically designed for carburetors. These include Simple Green, Purple Power, and specialized carburetor cleaning solutions from companies like Berryman. Research and choose a brand with a proven track record and positive user reviews.
## The Ultrasonic Carburetor Cleaning Process: A Step-by-Step Guide
Follow these steps to ensure a safe and effective ultrasonic carburetor cleaning process:
1. **Disassembly:** Carefully disassemble the carburetor, removing all jets, needles, floats, and other removable components. Keep track of the location of each part to ensure proper reassembly.
2. **Pre-Cleaning (Optional):** If the carburetor is heavily contaminated, pre-cleaning with a brush and solvent can remove loose debris and improve the effectiveness of the ultrasonic cleaning process.
3. **Solution Preparation:** Prepare the cleaning solution according to the manufacturer’s instructions. Fill the ultrasonic cleaner tank with the solution.
4. **Part Placement:** Place the carburetor components in the ultrasonic cleaner basket. Ensure that the parts are not touching each other or the sides of the tank.
5. **Cleaning Cycle:** Set the timer and temperature on the ultrasonic cleaner. Start the cleaning cycle.
6. **Rinsing:** After the cleaning cycle is complete, remove the parts from the ultrasonic cleaner and rinse them thoroughly with clean water. You can also use compressed air to dry the parts.
7. **Inspection:** Inspect the parts carefully for any remaining contamination. If necessary, repeat the cleaning process.
8. **Reassembly:** Reassemble the carburetor, ensuring that all parts are properly installed and tightened.
9. **Adjustment:** Adjust the carburetor settings as needed to ensure optimal engine performance.
### Safety Precautions
* Always wear appropriate personal protective equipment (e.g., gloves, eye protection) when handling cleaning solutions.
* Ensure proper ventilation when using solvent-based solutions.
* Never mix different cleaning solutions.
* Do not operate the ultrasonic cleaner without cleaning solution in the tank.
* Do not immerse electrical components in the cleaning solution.
## Advantages of Ultrasonic Carburetor Cleaning
Ultrasonic cleaning offers several significant advantages over traditional cleaning methods:
* **Thorough Cleaning:** Ultrasonic cleaning reaches areas that are inaccessible to manual cleaning methods, ensuring a complete and even clean.
* **Time Savings:** Ultrasonic cleaning is much faster than manual cleaning, saving you time and effort.
* **Gentle Cleaning:** Ultrasonic cleaning is gentle on delicate parts, minimizing the risk of damage.
* **Improved Performance:** Ultrasonic cleaning restores the carburetor to its original performance specifications, improving engine performance and fuel economy.
* **Extended Lifespan:** By removing contaminants that can cause wear and corrosion, ultrasonic cleaning can extend the lifespan of your carburetor.
## Disadvantages and Limitations
While ultrasonic cleaning offers numerous benefits, it also has some limitations:
* **Initial Investment:** Ultrasonic cleaners can be expensive, especially high-quality models.
* **Cleaning Solution Costs:** Cleaning solutions can add to the overall cost of the cleaning process.
* **Material Compatibility:** Some cleaning solutions can be harmful to certain materials.
* **Not a Miracle Cure:** Ultrasonic cleaning cannot repair damaged or worn parts. If your carburetor has mechanical issues, it may need to be repaired or replaced.
* **Requires Disassembly:** The carburetor must be disassembled for proper cleaning, which can be time-consuming.
## Is Ultrasonic Carburetor Cleaning Right for You?
Ultrasonic carburetor cleaning is an excellent option for anyone who wants to thoroughly clean their carburetor and restore it to its original performance specifications. It is particularly beneficial for:
* **Classic Car Owners:** Classic cars often have carburetors that are difficult to clean manually.
* **Motorcycle Enthusiasts:** Motorcycles are prone to carburetor issues due to their exposure to the elements.
* **Small Engine Repair Professionals:** Ultrasonic cleaning can save time and improve the quality of small engine repairs.
* **Anyone Seeking Optimal Performance:** If you want your engine to run at its best, ultrasonic carburetor cleaning is a worthwhile investment.
However, if you are on a tight budget or only need to clean a carburetor occasionally, manual cleaning methods may be sufficient. Also, if your carburetor has significant mechanical damage, ultrasonic cleaning will not solve the problem.
## Key Alternatives to Ultrasonic Cleaning
While ultrasonic cleaning is highly effective, alternative methods exist, each with its own set of pros and cons.
* **Manual Cleaning:** This involves disassembling the carburetor and using brushes, solvents, and picks to remove contaminants. It’s a labor-intensive process and may not reach all areas effectively. However, it’s a cost-effective option for simple cleaning tasks.
* **Carburetor Dip:** This involves soaking the carburetor in a chemical dip solution. It’s more effective than manual cleaning but can be harsh on certain materials and may not reach all areas. Also, proper disposal of the used dip solution is crucial due to its hazardous nature.
## Expert Verdict and Recommendation
After extensive research and practical experience with various cleaning methods, our expert opinion is that ultrasonic cleaning is the most effective and efficient way to clean carburetors. While it requires an initial investment, the benefits in terms of thoroughness, time savings, and improved performance make it a worthwhile investment for serious enthusiasts and professionals alike. We recommend choosing a high-quality ultrasonic cleaner with adjustable settings and using a cleaning solution specifically designed for carburetors. For those seeking optimal engine performance and longevity, ultrasonic carburetor cleaning is the clear choice.
## Q&A: Expert Answers to Your Carburetor Cleaning Questions
Here are some frequently asked questions about ultrasonic carburetor cleaning, answered by our team of experts:
1. **Q: How often should I clean my carburetor using an ultrasonic cleaner?**
**A:** The frequency of cleaning depends on several factors, including the age of the carburetor, the type of fuel used, and the operating conditions. As a general rule, cleaning every 1-2 years is recommended for carburetors used regularly. For carburetors used less frequently, cleaning every 3-5 years may be sufficient.
2. **Q: Can I use dish soap as a cleaning solution in my ultrasonic cleaner?**
**A:** While dish soap may seem like a convenient option, it is not recommended for use in ultrasonic cleaners. Dish soap can create excessive foam, which can reduce the effectiveness of the cleaning process and potentially damage the cleaner. Use a cleaning solution specifically formulated for ultrasonic cleaning instead.
3. **Q: How long should I run the ultrasonic cleaner for each cleaning cycle?**
**A:** The cleaning time depends on the level of contamination and the effectiveness of the cleaning solution. Start with a 15-minute cleaning cycle and inspect the parts. If necessary, repeat the cleaning cycle for an additional 15 minutes. For heavily contaminated carburetors, longer cleaning times may be required.
4. **Q: Can I clean rubber or plastic parts in an ultrasonic cleaner?**
**A:** Some rubber and plastic parts can be damaged by ultrasonic cleaning, especially when using solvent-based solutions. It is best to remove these parts before cleaning or test them on a small, inconspicuous area first. Use a mild, water-based cleaning solution and a short cleaning cycle for sensitive parts.
5. **Q: What should I do if my carburetor is still dirty after ultrasonic cleaning?**
**A:** If your carburetor is still dirty after ultrasonic cleaning, try the following:
* Use a more concentrated cleaning solution.
* Increase the cleaning time.
* Use a higher power level (if your cleaner has adjustable power).
* Pre-clean the carburetor with a brush and solvent.
* Inspect the carburetor for any clogged passages and clean them with a wire or pin.
6. **Q: How do I dispose of used cleaning solution?**
**A:** The proper disposal of used cleaning solution depends on the type of solution used. Water-based solutions can usually be disposed of down the drain with plenty of water. Solvent-based solutions and acid-based solutions must be disposed of as hazardous waste. Contact your local waste management authority for information on proper disposal methods.
7. **Q: Can ultrasonic cleaning damage my carburetor?**
**A:** While ultrasonic cleaning is generally safe, it can damage certain materials or parts if not done properly. Avoid using harsh cleaning solutions or excessive power levels. Always follow the manufacturer’s instructions and test on a small, inconspicuous area first.
8. **Q: What type of maintenance does an ultrasonic cleaner require?**
**A:** Ultrasonic cleaners require minimal maintenance. Regularly clean the tank to remove any debris or residue. Replace the cleaning solution as needed. Periodically check the transducers for damage and replace them if necessary.
9. **Q: Will ultrasonic cleaning fix a carburetor with mechanical problems?**
**A:** No, ultrasonic cleaning will not fix a carburetor with mechanical problems such as worn parts, bent needles, or damaged floats. Ultrasonic cleaning is only effective for removing contaminants. Mechanical problems must be addressed separately.
10. **Q: Where can I find a reputable ultrasonic cleaner repair service?**
**A:** Contact the manufacturer of your ultrasonic cleaner for information on authorized repair services. You can also search online for local electronic repair shops that specialize in ultrasonic equipment.
## Conclusion: Embrace Ultrasonic Cleaning for a Superior Carburetor
In conclusion, an **ultrasonic parts cleaner for carburetors** represents a significant advancement in carburetor maintenance. By harnessing the power of cavitation, this technology offers a deep, thorough, and efficient cleaning solution that surpasses traditional methods. While there are considerations to keep in mind, such as the initial investment and the need for proper safety precautions, the benefits in terms of performance, longevity, and ease of use make it a worthwhile investment for any serious enthusiast or professional mechanic. Embrace the power of ultrasonic cleaning and experience the difference it can make in the performance of your engine.
Now that you’ve gained a comprehensive understanding of ultrasonic carburetor cleaning, we encourage you to take the next step. Share your experiences with ultrasonic parts cleaner for carburetors in the comments below, or explore our advanced guide to carburetor tuning for even greater performance gains.
