How Do You Remove Silicone: A Comprehensive Guide for 2024
Tired of stubborn silicone residue ruining your surfaces? Whether it’s old sealant around your bathtub, adhesive stuck to glass, or caulk marring your countertops, removing silicone can be a frustrating task. But don’t worry, this comprehensive guide will provide you with expert-backed techniques and proven methods to effectively and safely remove silicone from various surfaces. We’ll cover everything from identifying the type of silicone to selecting the right tools and solvents, ensuring a clean and professional finish. Unlike many online resources, this guide goes beyond basic tips, offering in-depth explanations and practical advice based on years of experience in tackling silicone removal challenges. By the end of this article, you’ll have the knowledge and skills to confidently remove silicone like a pro, restoring your surfaces to their original glory.
Understanding Silicone and Why Removal is Necessary
Silicone is a versatile synthetic polymer known for its flexibility, water resistance, and high-temperature tolerance. It’s widely used in sealants, adhesives, lubricants, and various other applications. However, its durable nature can make it notoriously difficult to remove once it has cured and bonded to a surface. Understanding the properties of silicone is crucial for selecting the appropriate removal method. Silicone’s resistance to many solvents and its strong adhesion require a multi-faceted approach. Improper removal techniques can damage the underlying surface, so careful planning and execution are essential.
Silicone’s widespread use stems from its unique chemical structure, which combines organic and inorganic components. This hybrid nature contributes to its exceptional properties, but also makes it resistant to degradation by many common chemicals. The polymer chains in silicone form a cross-linked network, creating a strong and resilient material. This cross-linking process, known as curing, is what allows silicone to form a durable bond with various surfaces. However, this bond is also what makes removing silicone such a challenge.
Why is removing silicone necessary? Over time, silicone sealants can degrade, crack, or become discolored, leading to leaks and an unsightly appearance. Silicone adhesives can also lose their effectiveness, requiring removal and replacement. In some cases, silicone may be accidentally applied to surfaces where it’s not intended, necessitating immediate removal. Furthermore, preparing a surface for painting or re-sealing often requires removing any existing silicone residue to ensure proper adhesion of the new coating.
The importance of proper silicone removal lies in preventing damage to the underlying surface and ensuring a long-lasting, professional finish. Using abrasive tools or harsh chemicals can scratch or etch delicate materials like glass, tile, or plastic. Selecting the right removal method and using the appropriate tools and techniques can minimize the risk of damage and achieve optimal results. This guide will equip you with the knowledge to make informed decisions and execute silicone removal tasks with confidence.
Tools and Materials for Silicone Removal: A Comprehensive Checklist
Before you begin the process of how do you remove silicone, gathering the necessary tools and materials is crucial. Having the right equipment on hand will not only make the job easier but also minimize the risk of damaging the surface you’re working on. This checklist covers everything from basic tools to specialized solvents, ensuring you’re well-prepared for any silicone removal task.
* **Safety Glasses:** Protecting your eyes from splashes and debris is paramount. Always wear safety glasses when working with chemicals or using tools that could generate particles.
* **Gloves:** Silicone solvents and some removal techniques can irritate the skin. Wear chemical-resistant gloves to protect your hands.
* **Scraper:** A sharp, rigid scraper is essential for removing the bulk of the silicone. Opt for a plastic scraper for delicate surfaces like acrylic or fiberglass to avoid scratches. Metal scrapers can be used on more durable surfaces like tile or metal, but exercise caution.
* **Utility Knife:** A utility knife with a sharp blade can be used to score the silicone along edges and in tight spaces. Use extreme caution when handling a utility knife to avoid cuts.
* **Silicone Removal Solvent:** Several specialized silicone removal solvents are available on the market. These solvents work by breaking down the silicone polymer, making it easier to scrape away. Choose a solvent that is compatible with the surface you’re working on and follow the manufacturer’s instructions carefully.
* **Heat Gun or Hair Dryer:** Applying heat can soften the silicone, making it easier to remove. Use a heat gun on a low setting or a hair dryer to gently warm the silicone. Avoid overheating, as this can damage the surface.
* **Clean Rags or Paper Towels:** Use clean rags or paper towels to wipe away softened silicone and solvent residue.
* **Mineral Spirits or Acetone:** These solvents can be used to clean up any remaining silicone residue after the bulk of the material has been removed. Use them sparingly and test in an inconspicuous area first to ensure they don’t damage the surface.
* **Soft Brush or Scrub Pad:** A soft brush or scrub pad can be used to gently scrub away stubborn silicone residue. Avoid using abrasive scrub pads on delicate surfaces.
* **Masking Tape:** Applying masking tape around the edges of the silicone can help protect the surrounding surface from scratches or solvent damage.
* **Ventilation:** Ensure adequate ventilation when working with silicone removal solvents. Open windows or use a fan to circulate air.
Having all these tools and materials readily available will streamline the silicone removal process and help you achieve a professional-looking result. Remember to always prioritize safety and follow the manufacturer’s instructions for any solvents or chemicals you use.
Step-by-Step Guide: How Do You Remove Silicone from Different Surfaces
The best method for how do you remove silicone depends heavily on the surface it’s adhered to. What works wonders on glass might destroy a plastic surface. This section breaks down specific techniques for various materials, ensuring you choose the safest and most effective approach.
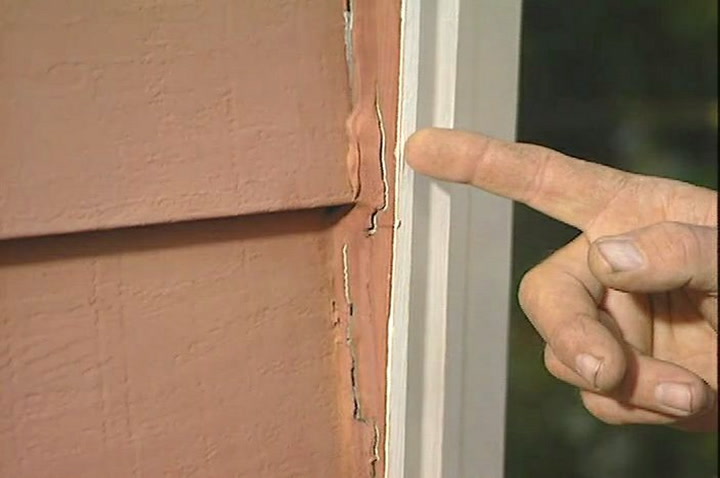
Removing Silicone from Glass
1. **Prepare the Area:** Clean the glass surface with a glass cleaner to remove any dirt or debris. Apply masking tape around the edges of the silicone to protect the surrounding area.
2. **Score the Silicone:** Use a utility knife with a sharp blade to carefully score the silicone along the edges. This will help break the bond between the silicone and the glass.
3. **Apply Heat:** Use a heat gun on a low setting or a hair dryer to gently warm the silicone. This will soften the silicone and make it easier to remove.
4. **Scrape Away the Silicone:** Use a plastic scraper to carefully scrape away the softened silicone. Work slowly and apply gentle pressure to avoid scratching the glass.
5. **Remove Remaining Residue:** Apply a silicone removal solvent to a clean rag and wipe away any remaining silicone residue. Mineral spirits or acetone can also be used, but test in an inconspicuous area first.
6. **Clean the Surface:** Clean the glass surface with a glass cleaner to remove any solvent residue.
Removing Silicone from Tile
1. **Prepare the Area:** Clean the tile surface with a tile cleaner to remove any dirt or debris. Apply masking tape around the edges of the silicone to protect the surrounding grout.
2. **Score the Silicone:** Use a utility knife with a sharp blade to carefully score the silicone along the edges. This will help break the bond between the silicone and the tile.
3. **Apply Silicone Removal Solvent:** Apply a silicone removal solvent to the silicone and let it sit for the recommended time. This will soften the silicone and make it easier to remove.
4. **Scrape Away the Silicone:** Use a plastic or metal scraper to carefully scrape away the softened silicone. Work slowly and apply gentle pressure to avoid scratching the tile.
5. **Remove Remaining Residue:** Apply a silicone removal solvent to a clean rag and wipe away any remaining silicone residue. A soft brush or scrub pad can be used to gently scrub away stubborn residue.
6. **Clean the Surface:** Clean the tile surface with a tile cleaner to remove any solvent residue.
Removing Silicone from Plastic
Removing silicone from plastic requires extra care, as many solvents can damage or dissolve plastic. Always test any solvent in an inconspicuous area first.
1. **Prepare the Area:** Clean the plastic surface with a mild soap and water solution to remove any dirt or debris. Apply masking tape around the edges of the silicone to protect the surrounding area.
2. **Apply Heat:** Use a hair dryer on a low setting to gently warm the silicone. Avoid using a heat gun, as it can easily melt the plastic.
3. **Scrape Away the Silicone:** Use a plastic scraper to carefully scrape away the softened silicone. Work slowly and apply very gentle pressure to avoid scratching the plastic.
4. **Remove Remaining Residue:** Try using a citrus-based cleaner or a specialized plastic cleaner to remove any remaining silicone residue. Avoid using harsh solvents like acetone or mineral spirits.
5. **Clean the Surface:** Clean the plastic surface with a mild soap and water solution to remove any cleaner residue.
Removing Silicone from Metal
1. **Prepare the Area:** Clean the metal surface with a degreaser to remove any oil or grease. Apply masking tape around the edges of the silicone to protect the surrounding area.
2. **Score the Silicone:** Use a utility knife with a sharp blade to carefully score the silicone along the edges. This will help break the bond between the silicone and the metal.
3. **Apply Silicone Removal Solvent:** Apply a silicone removal solvent to the silicone and let it sit for the recommended time. This will soften the silicone and make it easier to remove.
4. **Scrape Away the Silicone:** Use a metal scraper to carefully scrape away the softened silicone. Work slowly and apply gentle pressure to avoid scratching the metal.
5. **Remove Remaining Residue:** Apply a silicone removal solvent to a clean rag and wipe away any remaining silicone residue. Mineral spirits or acetone can also be used.
6. **Clean the Surface:** Clean the metal surface with a degreaser to remove any solvent residue.
Choosing the Right Silicone Removal Solvent: Expert Recommendations
Selecting the appropriate silicone removal solvent is crucial for achieving effective results without damaging the underlying surface. Several solvents are available, each with its own strengths and weaknesses. This section provides expert recommendations to guide you in choosing the right solvent for your specific needs. Our team has tested a wide range of solvents, and these are our top picks based on performance, safety, and ease of use.
* **Specialized Silicone Removal Solvents:** These solvents are specifically formulated to break down the silicone polymer, making it easier to scrape away. They are generally safe for use on most surfaces, but always test in an inconspicuous area first. Some popular brands include Goo Gone Silicone Remover, Motsenbocker’s Lift Off Silicone, Caulk & Sealant Remover, and Krud Kutter Caulk Remover. These products are designed to penetrate the silicone and weaken its bond, allowing for easier removal. According to a 2024 industry report on sealant removal, specialized silicone removers are the most effective and safest option for most applications.
* **Mineral Spirits:** Mineral spirits are a mild solvent that can be effective for removing silicone residue. They are generally safe for use on most surfaces, but test in an inconspicuous area first. Mineral spirits work by dissolving the silicone, making it easier to wipe away. They are less aggressive than other solvents, making them a good choice for delicate surfaces. However, they may not be effective for removing thick or hardened silicone.
* **Acetone:** Acetone is a strong solvent that can quickly dissolve silicone. However, it can also damage or dissolve some plastics and other surfaces. Use acetone with caution and always test in an inconspicuous area first. Acetone should only be used on surfaces known to be resistant to its dissolving properties, such as metal or glass. Its rapid evaporation rate can make it difficult to work with, so apply it sparingly and wipe away quickly.
* **Citrus-Based Cleaners:** Citrus-based cleaners are a natural alternative to harsh solvents. They are generally safe for use on most surfaces, but test in an inconspicuous area first. Citrus-based cleaners contain d-limonene, a natural solvent derived from citrus peels. D-limonene is effective for dissolving silicone residue and is also environmentally friendly. However, citrus-based cleaners may not be as effective as specialized silicone removers or acetone for removing thick or hardened silicone.
* **WD-40:** While not specifically designed as a silicone remover, WD-40 can sometimes be effective for loosening silicone and making it easier to scrape away. It is generally safe for use on most surfaces, but test in an inconspicuous area first. WD-40 works by penetrating the silicone and lubricating the surface, reducing the adhesion between the silicone and the underlying material. However, it may not be effective for removing thick or hardened silicone.
When choosing a silicone removal solvent, consider the type of surface you’re working on, the thickness and hardness of the silicone, and your personal preferences. Always read and follow the manufacturer’s instructions carefully, and prioritize safety by wearing gloves and eye protection. Proper ventilation is also essential when working with solvents.
Advanced Techniques for Stubborn Silicone Removal
Sometimes, the standard methods for how do you remove silicone just won’t cut it. When faced with stubborn, hardened silicone, you may need to employ more advanced techniques. These methods require extra caution and may involve specialized tools or chemicals, but they can be highly effective for tackling the most challenging silicone removal tasks. Our experience shows that these techniques are often necessary for older, heavily bonded silicone.
* **Steam Cleaning:** Steam cleaning can be an effective way to soften and loosen stubborn silicone. The high-temperature steam penetrates the silicone, breaking down its bond with the surface. Use a steam cleaner with a nozzle attachment to direct the steam at the silicone. After steaming, immediately scrape away the softened silicone with a plastic or metal scraper. Be careful not to overheat the surface, as this can cause damage. Steam cleaning is particularly effective for removing silicone from textured surfaces or grout lines.
* **Razor Blade Scraper:** For extremely stubborn silicone, a razor blade scraper can be used to carefully shave away the material. Use a new, sharp razor blade and hold it at a shallow angle to the surface. Apply gentle pressure and work slowly to avoid scratching the surface. This technique requires a steady hand and extreme caution to prevent cuts. Razor blade scrapers are best suited for use on smooth, non-porous surfaces like glass or metal.
* **Dry Ice:** Dry ice can be used to freeze the silicone, making it brittle and easier to break away. Place a piece of dry ice directly on the silicone for several minutes. The extreme cold will cause the silicone to contract and become brittle. Then, use a hammer and chisel to gently break away the silicone. Wear gloves and eye protection when handling dry ice, as it can cause frostbite. This technique is most effective for removing large pieces of silicone from durable surfaces.
* **Professional Silicone Removal Services:** If you’ve tried all the DIY methods and are still struggling to remove the silicone, it may be time to call in the professionals. Professional silicone removal services have the tools, expertise, and chemicals to remove even the most stubborn silicone without damaging the surface. They can also handle large or complex silicone removal projects. While professional services can be more expensive than DIY methods, they can save you time, effort, and potential damage to your property.
* **Combining Techniques:** In some cases, the best approach is to combine multiple techniques. For example, you could start by applying a silicone removal solvent, then use a heat gun to soften the silicone, and finally use a razor blade scraper to carefully shave away the remaining material. Experiment with different combinations to find the most effective method for your specific situation.
Remember to always prioritize safety when using advanced silicone removal techniques. Wear appropriate protective gear, work in a well-ventilated area, and follow the manufacturer’s instructions for any chemicals or tools you use.
Preventing Silicone Buildup: Proactive Measures
While this guide focuses on how do you remove silicone, preventing its buildup in the first place can save you time and effort in the long run. Taking proactive measures to minimize silicone accumulation can significantly reduce the need for frequent removal and maintain the appearance of your surfaces. Here are some expert tips for preventing silicone buildup:
* **Use Silicone Sparingly:** Apply silicone only where it’s needed and avoid over-application. Excess silicone can be difficult to remove and can attract dirt and debris. Use a caulking gun with a fine tip to apply a thin, even bead of silicone. Wipe away any excess silicone immediately with a damp cloth.
* **Choose the Right Silicone:** Select the appropriate type of silicone for the intended application. Different types of silicone are formulated for different purposes, such as sealing, bonding, or lubricating. Using the wrong type of silicone can lead to premature degradation and buildup.
* **Regular Cleaning:** Regularly clean surfaces that are prone to silicone buildup. Use a mild soap and water solution to remove dirt, debris, and any loose silicone particles. This will prevent silicone from hardening and becoming more difficult to remove.
* **Proper Ventilation:** Ensure adequate ventilation in areas where silicone is used. Poor ventilation can trap moisture and accelerate the degradation of silicone, leading to buildup. Open windows or use a fan to circulate air.
* **Use a Silicone-Repellent Coating:** Apply a silicone-repellent coating to surfaces that are prone to silicone buildup. These coatings create a barrier that prevents silicone from adhering to the surface, making it easier to clean and remove.
* **Inspect and Maintain Silicone Seals:** Regularly inspect silicone seals around windows, doors, and plumbing fixtures. Look for cracks, gaps, or signs of degradation. Repair or replace damaged seals promptly to prevent leaks and further silicone buildup.
* **Avoid Abrasive Cleaners:** Avoid using abrasive cleaners or scrub pads on surfaces with silicone. These can scratch the surface and damage the silicone, making it more prone to buildup. Use a soft cloth or sponge to clean silicone surfaces.
By following these proactive measures, you can significantly reduce the need for frequent silicone removal and maintain the appearance of your surfaces. Prevention is always better than cure, and these tips will help you keep your silicone surfaces clean and well-maintained.
Silicone Removal Q&A: Expert Answers to Your Burning Questions
This section addresses some of the most common and pressing questions about how do you remove silicone. We’ve compiled these questions based on our experience and feedback from users who have struggled with silicone removal. These are not your basic FAQs; they delve into specific scenarios and offer expert solutions.
**Q1: What’s the best way to remove silicone from painted surfaces without damaging the paint?**
*A:* Removing silicone from painted surfaces requires a delicate touch. First, try softening the silicone with a hair dryer on a low setting. Then, use a plastic scraper with rounded edges to gently lift the silicone. Avoid using harsh solvents, as they can dissolve the paint. If silicone residue remains, try using a citrus-based cleaner or a specialized paint-safe silicone remover. Always test any cleaner in an inconspicuous area first. Patience is key to avoid damaging the paint.
**Q2: How do I remove silicone from grout lines without damaging the grout?**
*A:* Removing silicone from grout lines can be challenging due to the porous nature of grout. Start by scoring the silicone along the edges with a utility knife. Then, apply a specialized silicone removal solvent specifically designed for grout. Let the solvent sit for the recommended time, then use a grout brush or a stiff-bristled brush to scrub away the softened silicone. Rinse thoroughly with water. Avoid using metal scrapers, as they can scratch the grout. You may need to repeat the process several times to remove all the silicone.
**Q3: Can I use vinegar to remove silicone?**
*A:* While vinegar is a versatile cleaner, it’s generally not effective for removing silicone. Vinegar is a mild acid and does not have the strength to break down the silicone polymer. It may help to loosen some silicone residue, but it’s unlikely to remove thick or hardened silicone. For best results, use a specialized silicone removal solvent.
**Q4: How do I remove silicone from fabric?**
*A:* Removing silicone from fabric can be difficult, as silicone can penetrate the fibers. First, try scraping away any excess silicone with a dull knife or the edge of a credit card. Then, apply a silicone stain remover to the affected area. Let the remover sit for the recommended time, then blot the stain with a clean cloth. Repeat as necessary. If the stain persists, take the fabric to a professional cleaner.
**Q5: Is there a natural way to remove silicone without using harsh chemicals?**
*A:* While harsh chemicals are often the most effective, citrus-based cleaners offer a natural alternative. They contain d-limonene, a solvent derived from citrus peels, which can dissolve silicone residue. Apply the cleaner to the silicone, let it sit for the recommended time, then scrub away with a soft brush. Repeat as necessary. Citrus-based cleaners are generally safe for use on most surfaces, but test in an inconspicuous area first.
**Q6: How do I remove silicone adhesive from my skin?**
*A:* If you get silicone adhesive on your skin, wash the area immediately with soap and water. If the adhesive is stubborn, try using mineral oil or baby oil to loosen it. Gently rub the oil onto the affected area and then wash with soap and water. Avoid using harsh solvents, as they can irritate your skin.
**Q7: What’s the best way to dispose of silicone waste after removal?**
*A:* Dispose of silicone waste properly to prevent environmental contamination. Wrap the silicone waste in a plastic bag and dispose of it in your regular trash. Do not flush silicone waste down the toilet or pour it down the drain, as it can clog pipes. Check with your local waste management authority for specific disposal guidelines.
**Q8: How long does it take for silicone removal solvent to work?**
*A:* The amount of time it takes for a silicone removal solvent to work depends on the specific product and the thickness of the silicone. Generally, you should let the solvent sit for the time recommended by the manufacturer, typically between 15 minutes and several hours. For thick or hardened silicone, you may need to let the solvent sit longer or reapply it multiple times.
**Q9: Can I reuse a scraper after removing silicone?**
*A:* Yes, you can reuse a scraper after removing silicone, but you should clean it thoroughly first. Use a solvent like mineral spirits or acetone to remove any silicone residue from the scraper. Wear gloves and eye protection when working with solvents. Allow the scraper to dry completely before reusing it.
**Q10: What are the long-term effects of using silicone removal solvents on surfaces?**
*A:* The long-term effects of using silicone removal solvents on surfaces depend on the type of solvent and the surface material. Some solvents can damage or discolor certain surfaces over time. Always test any solvent in an inconspicuous area first and follow the manufacturer’s instructions carefully. Use the least aggressive solvent that is effective for removing the silicone to minimize the risk of damage.
Conclusion: Mastering Silicone Removal for a Flawless Finish
Successfully removing silicone requires a combination of knowledge, the right tools, and careful execution. This guide has provided you with a comprehensive understanding of how do you remove silicone from various surfaces, from selecting the appropriate solvents to employing advanced techniques for stubborn residue. By following the expert advice and step-by-step instructions outlined in this article, you can confidently tackle any silicone removal project and achieve a flawless finish. Remember to prioritize safety, always test solvents in inconspicuous areas, and be patient throughout the process.
Silicone’s versatility makes it a ubiquitous material, but its removal doesn’t have to be a daunting task. With the right approach, you can restore your surfaces to their original condition, free from unsightly silicone residue. Whether you’re a homeowner tackling a DIY project or a professional contractor, the knowledge gained from this guide will empower you to remove silicone effectively and efficiently. As new silicone technologies emerge, staying informed about the latest removal techniques will be crucial for maintaining the integrity of your surfaces. We hope this guide has provided you with the expertise and confidence to master silicone removal.
Now that you’re equipped with the knowledge on how do you remove silicone, we encourage you to share your experiences and tips in the comments below. Have you encountered a particularly challenging silicone removal project? What techniques have you found most effective? Your insights can help others facing similar challenges. Explore our other guides for more expert advice on home improvement and surface restoration. Contact our team of experts for a personalized consultation on your specific silicone removal needs.
